How to Set Up Square Online Ordering for Restaurants and Food Businesses
I’ve seen a restaurant owner add every item to Square, open their ordering page, and wonder: Where did the menu go?
Usually, the items are there. Square just has several places where your website, menu, and pickup settings need to connect. Miss one, and your customers may see an empty page instead of your lunch menu.
In the video below, I build a sample food business menu from scratch. We’ll add menu items, sizes, and customization options; organize the menu; turn on pickup; and make the ordering page feel like part of your brand.
Before you open Square, get these three things ready
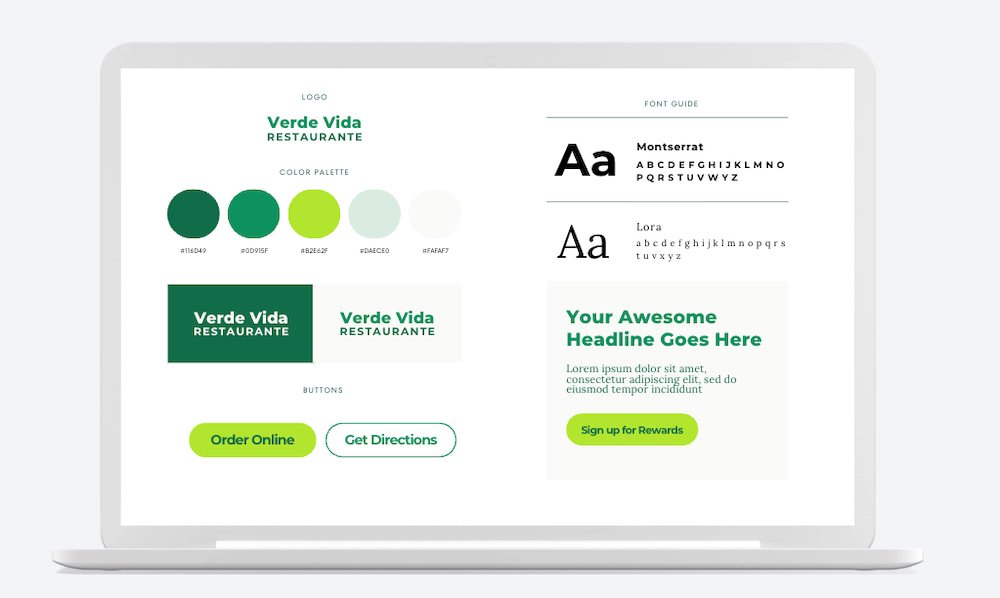
1. A simple brand guide
Keep your logo, brand colors (including hex codes), and fonts in one place. You’ll use them when you style your ordering page later.
Grab your free Canva Template I shared in the video here :)
2. A written menu
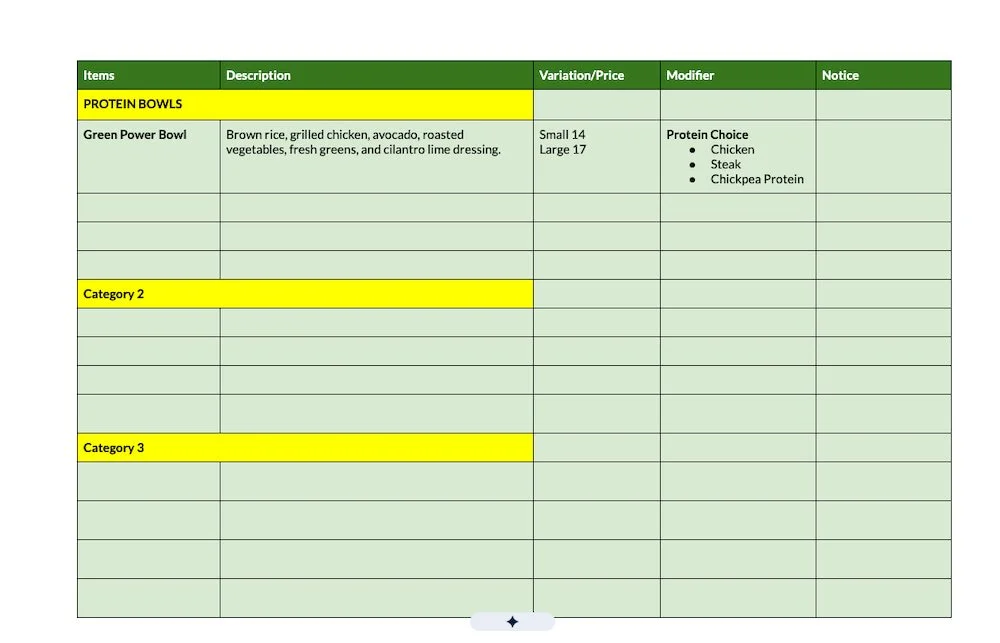
I like to put the entire menu in a Google Doc first. Group items under headings such as Bowls, Burritos, and Smoothies. For each item, include its name, description, price, available sizes, and choices customers can add or select.
Add any exceptions, too. If one item needs two hours of prep while your usual order needs 15 minutes, write that down now. Future you will appreciate it.
Grab your free copy her: https://docs.google.com/document/d/1PxLTc6Ol0OIirrtS1anXx8-ShX-IcbpF7bUC8SvBwYc/copy
3. Product photos that are named and compressed
Give each image a recognizable filename, such as tropical-mango-smoothie.jpg. Compress large photos before uploading so your page loads faster. I use TinyPNG in the video, but any reliable image compression tool works.
Step 1: Add your food and drink items
In your Square Dashboard, go to Items & Services → Items → Item Library → Create Item. For this example, choose Prepared Food and Beverage.
On your first pass, focus on four details for each item:
Name: What customers should see on the menu.
Description: A useful, appetizing explanation of what they’re ordering.
Price: The base price, or prices for each size.
Image: A clear photo of the actual item.
I add the full menu first, then use Square’s bulk editing tools for settings that apply to multiple items. It’s much quicker than opening each burrito one at a time to make the same change.
Variations or modifiers: which one should you use?
This is one of the questions I hear most often from food businesses.
Variations are versions of the item itself, often with their own prices. Think small and large protein bowls or regular and large smoothies. In the video, I create reusable size option sets so I can apply the same sizes to more than one product.
Modifiers are choices that customize an item. Think chicken, steak, or chickpea protein for a bowl, or a milk choice for a smoothie. A latte might have size variations, then modifiers for syrups, alternative milk, or cold foam.
If the sizes differ between product groups, set up separate option sets. My bowls use small/large, while smoothies use regular/large.
Step 2: Create modifier lists and attach them to the right items
Go to Items & Services → Modifiers and create a list for each type of choice. In my example, I make one list for Protein Choice and another for Milk Options.
You can add an extra charge to a choice when needed. You can also require a selection. If the kitchen needs to know which protein to prepare, I’d make that choice required and allow one selection. Then apply the modifier list to the items it belongs to. Protein choices go on the bowls; milk options go on the smoothies.
Check that the modifier is available on your website channel. A perfectly built list does little good if online customers can’t select it.
Step 3: Organize categories, then build the menu
Create categories under Items & Services → Categories. For the sample business, I use Protein Bowls, Burritos, and Smoothies, then add the relevant items to each.
Here’s the distinction that trips people up: categories help organize items for Square operations, including reporting and routing. Your menu determines how those items are presented for online ordering. Creating categories alone does not finish your customer-facing ordering menu.
Next, go to Menus, create a menu, and choose Use your existing categories. Select the categories you want customers to browse. You can search for “menu” in your Square Dashboard if the navigation looks different from the video.
After you create your site in the next step, return to this menu and connect it to that website’s sales channel.
Step 4: Set up the Square Online ordering page
Open Square Online from your dashboard and create a site, or open the editor for an existing one. In the video, I start with a basic site and set Order Online as the homepage.
Check the page type before you spend time styling it. For a restaurant-style ordering experience, select Order Online rather than Shop All, which is geared toward a retail catalog.
I prefer editing on desktop because it gives me more room to work. Then I preview the page on mobile, where many customers will actually place their orders.
Step 5: Make your items available to order
If your menu looks empty at this point, don’t panic. Go back to the Item Library and check these settings for your products:
Site visibility: The items are listed and visible on the site.
Sales channel: Your Square website is selected.
Fulfillment: The appropriate methods, such as pickup or local delivery, are enabled.
You can select multiple items and update these settings in bulk. Then check that the menu itself is assigned to your website channel. In the video, I also verify the website selection within the relevant pickup and delivery settings.
Quick troubleshooting tip: If an item exists in your library but isn’t on the ordering page, check the item’s visibility, website channel, fulfillment method, and menu assignment before recreating it.
Step 6: Set pickup hours and prep times
Search your Square Dashboard for Fulfillment Settings, then open Online Pickup and Delivery. Set the options that match how your business actually works:
When customers can pick up orders.
Whether they can order ahead.
Your standard preparation time.
How many pickup orders you can handle in a time slot, if you want a limit.
When order tickets should print.
Holiday closures and pickup instructions.
In the example, I use a 15-minute default prep time, business-specific pickup hours, and simple instructions telling customers where to collect their food. An item that takes longer can have its own prep time.
I also prefer having tickets print based on pickup time when that suits the kitchen’s workflow. A ticket for an order scheduled hours later can cause confusion if the team starts making it as soon as it prints.
Step 7: Make the ordering page look like your business
Now the fun part. In the Square Online editor, open Site Design and add your logo, colors, and fonts from your brand guide. Then preview how those styles look on the header, category navigation, buttons, item cards, and item details.
You can also adjust your item image crop, menu layout, and how prominently product photos appear. I like a layout where customers can clearly see the food, read the description, and find the order button without hunting for it.
Check the contrast while you style. A pretty button that disappears into the background won’t help anyone order. Some design controls may depend on your Square plan, so use the options available in your editor and preview the finished page on mobile.
Final check: Place yourself in your customer’s shoes
Before you share the link, open your ordering page as a customer and try to build an order. Can you find a product, choose a size, select the required modifiers, and choose a valid pickup time? Does the menu look good on a phone?
That last check catches the little things that are easy to miss when you’ve been staring at the dashboard for an hour. (Ask me how I know.)
Need help untangling your Square setup?
We can help clean up your menu, modifiers, ordering settings, and customer experience.
Frequently asked questions
What’s the difference between a Square category and a menu?
A category groups related items in Square. A menu is what you set up and connect to your online ordering channel to present those items to customers. In the video, I create categories first, then use them to build the menu.
Why aren’t my Square items showing on my website?
Check that each item is listed and visible, assigned to the correct website sales channel, and enabled for the fulfillment method you offer. Also confirm that your menu is connected to the website. These settings live in more than one place.
Should drink sizes be variations or modifiers?
If small, medium, and large are versions of the same drink with different prices, use variations. Use modifiers for choices such as syrup, milk, or cold foam.
Can I offer pickup and delivery through Square Online?
The walkthrough shows where to enable pickup and local delivery for items and where to configure online fulfillment settings. Set only the methods you actually offer, then test the ordering flow before sharing the page.